Here is a quick guide to repairing this UPS that suddenly won’t charge or turn on (mine would ‘chirp’ and do nothing). I will assume that you have checked the battery voltage and that it is good (26 volts or more for 2 batteries connected in a pack in series).
July 2023 update: Several 10uF 35V SMD capacitors failed with high ESR and one failed open circuit (C49). Several 4.7uF 25V SMD capacitors also now have high ESR. Based on this observation, I would recommend simply replacing all the SMD capacitors rather than fixing “only what’s broken”.
The problem more likely than not is the five 22uF 16V SMD electrolytic capacitors. There are four near the middle of the mainboard and one near the LED at the edge. The first thing I did, as usual when dealing with a spontaneous electronics failure, was to go over all the capacitors. When I tested the 22uF capacitors with an ESR meter, they read anywhere from tens of ohms to infinite resistance. I went over the rest of the SMD capacitors and they generally read from 1 to 5 ohms. So the 22uF caps were the outliers. Corroborating this theory were posts on forums about other similar small business models, Back-UPS RS 1500, Back-UPS RS 800, and APC Back-UPS RS 800 overload problem with no load: Solved indicating that the 22uF SMD capacitors were frequently at fault.
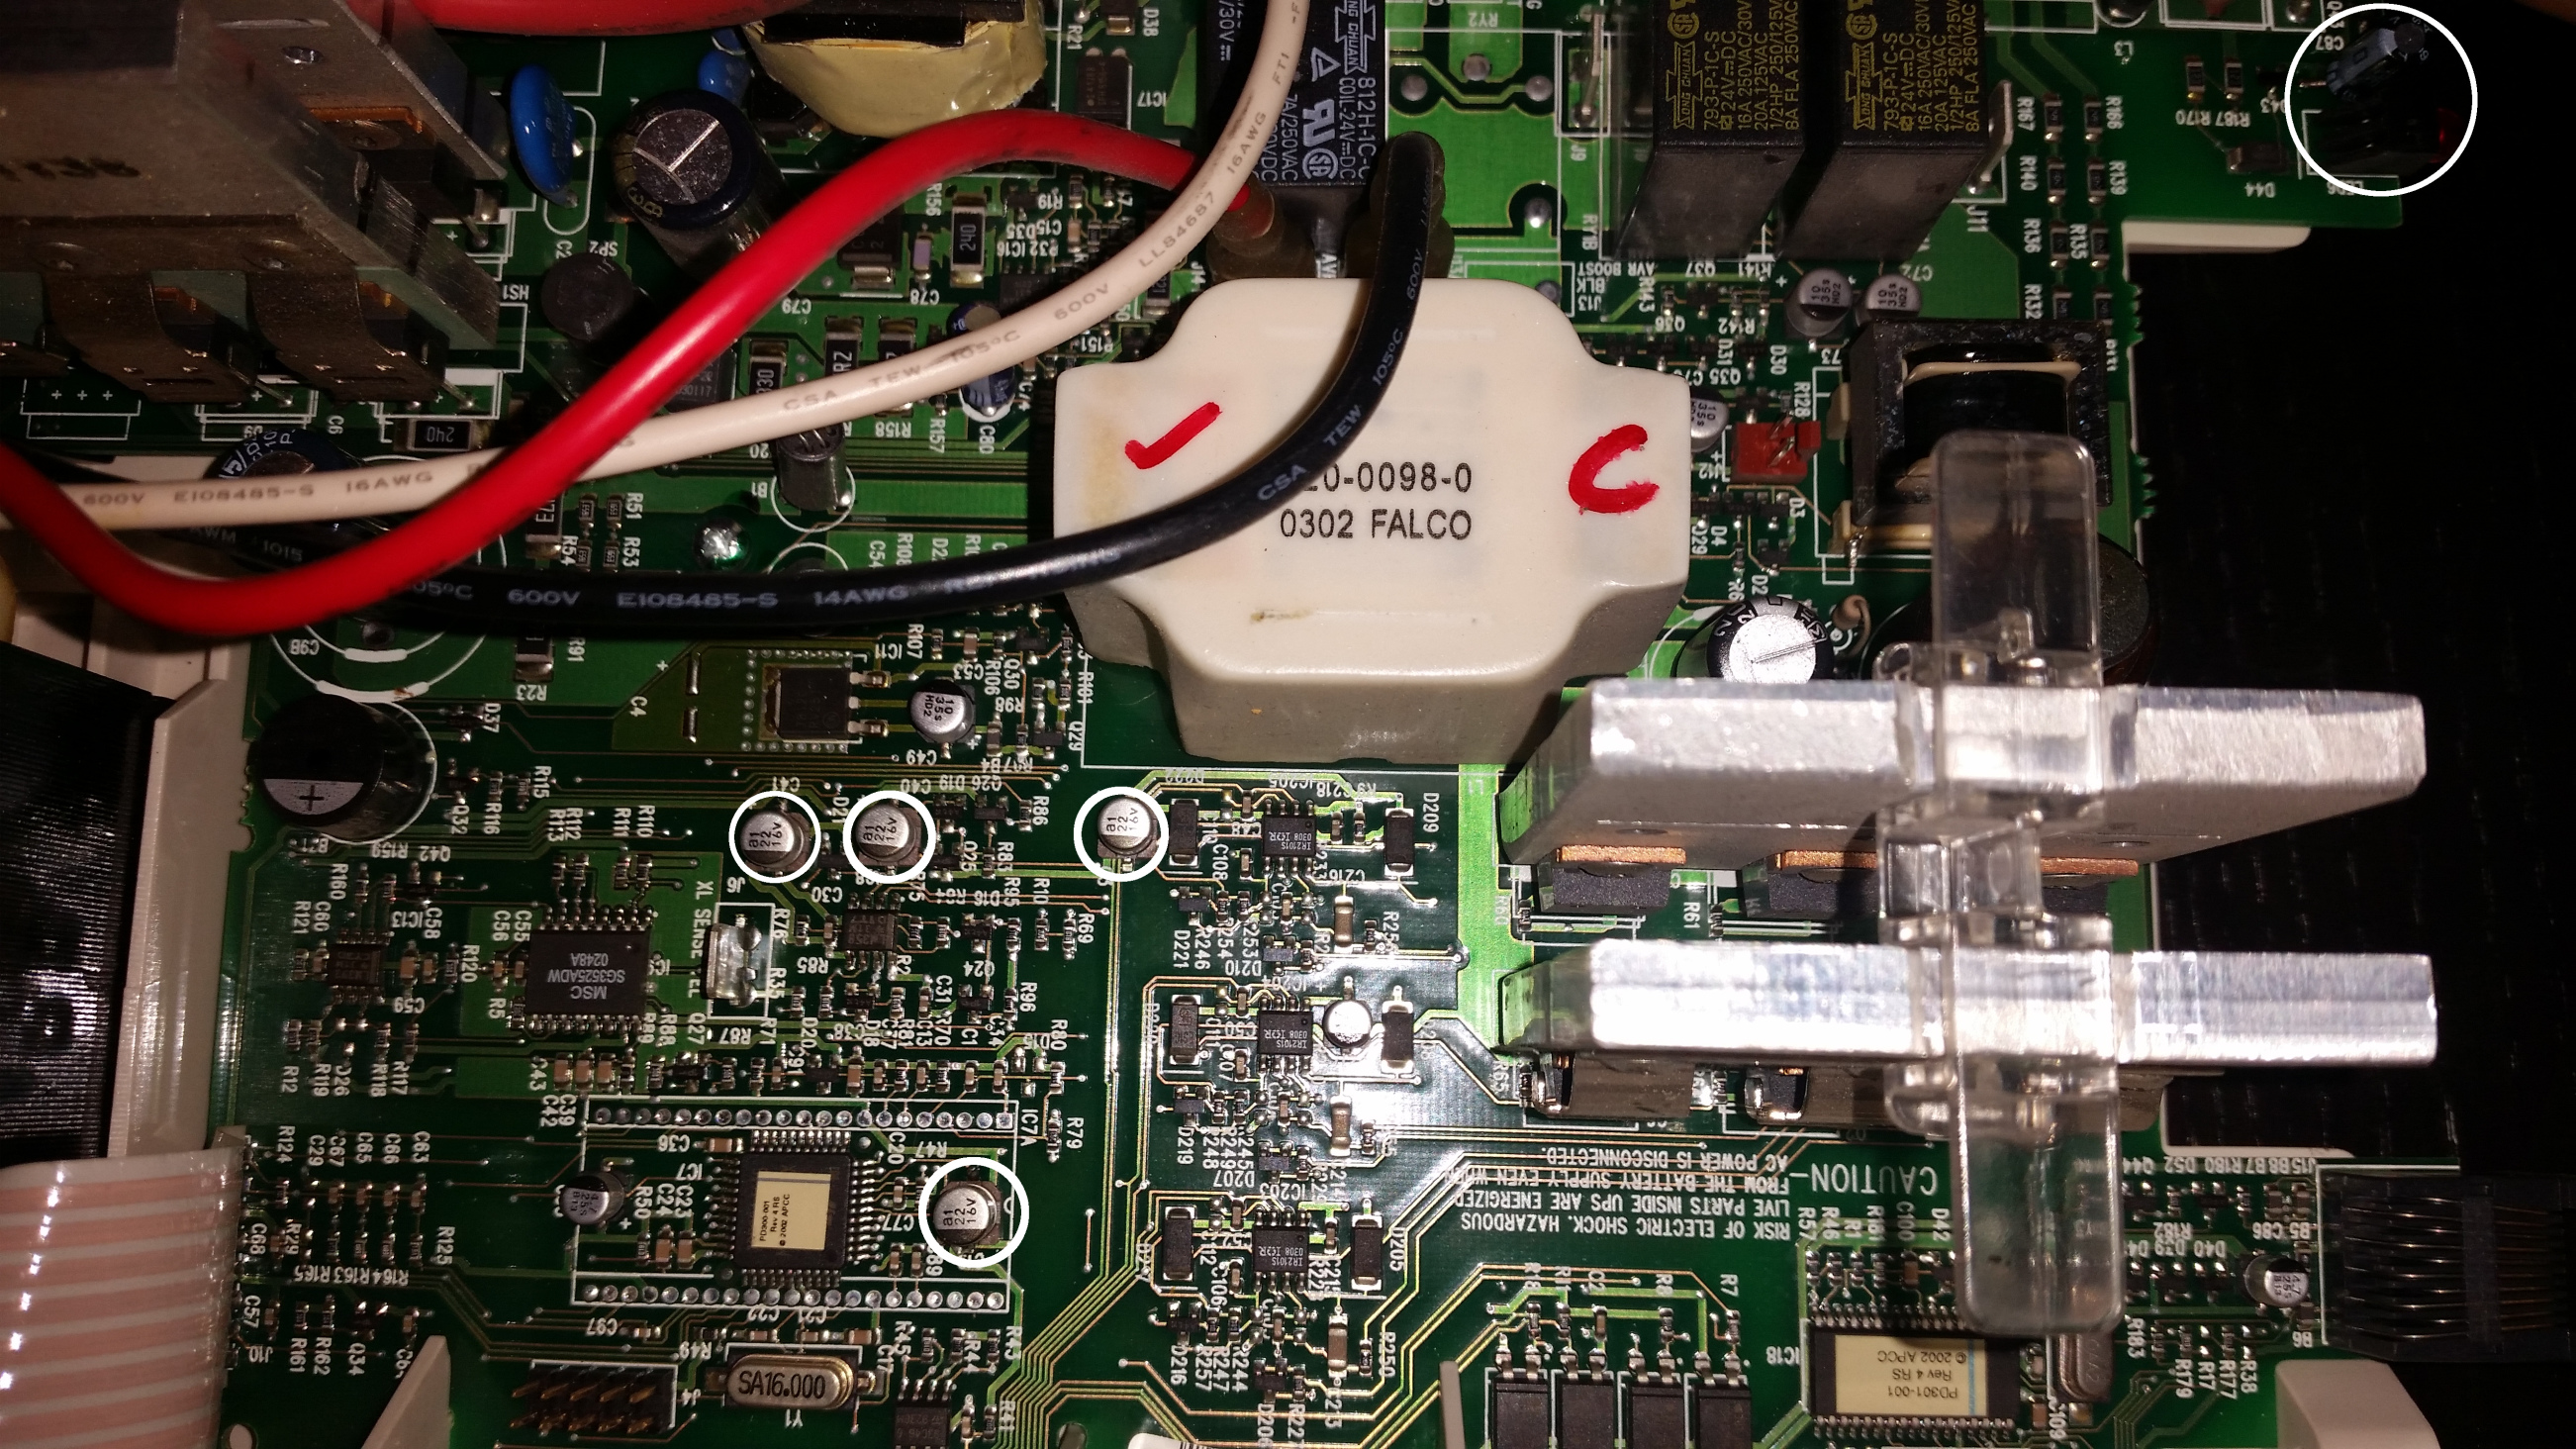
I replaced with some Kemet 22uF 16V 105 degree radial electrolytic capacitors I had on hand. The important thing is that the capacitor near the edge is not too tall. There is only a little more than 1 cm of room when the back cover is installed, so if you’re replacing the SMD caps with standard electrolytic caps which I would recommend for this job, it’s best to get replacement capacitors at 1 cm or less height. If the capacitor is too tall, you risk ripping the SMD pads off, so please don’t ruin your own day.
The job is straightforward; add flux from a pen or use a pencil to add a bit of new solder to the SMD pads if that’s your taste. Use the two solder pencil trick or a hot air station to carefully remove the SMD caps. I preheated to about 200F with my hot air station for about 15 seconds and then blasted each cap with its high heat setting; they came out easily after about 3 seconds. Tin the SMD pads with new solder and add a thin ‘bed’ of new solder. Bend the new caps at 90 degree angles and clip the leads to match the length of the pads. Tack-solder the new caps to the pads, then reheat each joint and add solder to finish, taking care not to melt or overheat the capacitor itself. Wiggle gently to check that the new caps are firmly attached to the pads. The results should look something like this image:

Fortunately, it’s very easy to check your work before putting it back together. Just plug it in, hook up batteries and power it on and check for intended operation.
This procedure should repair many of these plastic-housing APC units with similar designs. It seems that APC’s parts supplier had a bad day since out of all the SMD capacitors, only the 22uF SMD capacitors seem to be defective.
Hi, thnaks for the extensive ToDo list.
Unfortunately, after we replaced the caps (with propper SMD once), UPS still does not charge properly. It start tocharge up to about 20% and then discharges to 0. So far we were not able to charge the batteries (which are new) up to 100%.
Any ideas? All other electrolytics caps seem so be OK (atleast the ESR meter says so).
Nice write-up. The 22uF 16V caps are defective of many APC products, including in all four of mine (Back UPS XS1500, two XS1000, and RS-800). Replacing them with tantalum caps fixed a multitude of problems, but NOT the failure to charge properly. One of my XS1000 units charges to 49%, then discharges. It was working properly before a power outage due to a tripped GFI allowed complete discharge of the batteries. It now will not fully charge new or old batteries. This appears to be a widespread APC problem, even with the new models with LCD displays. APC makes repair difficult by forcing websites to take down schematics. I’ll try to write back when I find the cause. Looking at the ‘charging’ waveform with a scope, both positive and negative current pulses are present, and the negative pulse dominates.
After click of death lead to battery mode and 93V measurement from Parachute SW I replaced the 5 caps (SMT’s cheap from ebay using pencil iron). The cap furthest left in your pic was actually replaced by a 22uF 16V electrolytic “rigged” in from factory. I replaced with same. took about an hour
Working perfectly now!!! Thanks!
BTW, all the removed capacitors measured around 22uF. I suspect the ESR was high. Cheaper to replace than to buy an ESR meter. The factory rigged Electrolytic looks like it may have leaked.
Perfect. I repaired 2 APC 1500’s. Thank you very much.
Cheers
Thanks a lot for this post!
I’ve changed 4 22uF capacitors and my RS1500 is working properly now.
Thanks changed the caps with ceramic smd ones and my XS1500 is up and running
Many thanks! RS 1500 here. Did the C41 but about a year later I have the always on battery issue – so it’s worth replacing all of them
I’ve read your report on the APC Back Ups 1500 XS. My problem is that the unit doesn’t seem to recognize AC power and wants to operate on battery. I note that the “surge only” outlets are also dead, which I do not understand. Can you suggest a reason for this? When I remove the board and disconnect everything, there is zero resistance between the surge out and the line in (both neutral and hot), which is hard to explain. Any ideas?
More in line with your repair, mine shows a factory replacement of one of the caps. I’ll tackle the cap replacement once I understand the problem of the surge only outlets.
Thanks!
An update to my last post. i replaced all 5 22uF capacitors. After removal, I found their values to be 0.1, 2, 10, 14, and 16 uF. Clearly most needed replacement.
I have good news and bad news. The bad news is that I traced my problem to a faulty wall socket, which although I had checked it and it seemed to hold the plug firmly and registered 120V on probing and which powered a lamp just fine, apparently failed to make reliable connection to the UPS. I’ll dismantle the outlet after replacing it and so will be able to better understand the failure. The good news is that after replacing the caps and using a good wall outlet, the unit is running normally.
Based on the cap readings, I was probably getting close to failure so replacement was not a waste of time.
obrigado, graças a essa dica consegui consertar um nobreak com esse defeito…
I had the same problem as Herman. Replacing all the caps worked. I used 10uF. I doubt size matters since they seem to be for decoupling. I recommend soldering a axial leaded cap in parallel to the SMD one. Faster and less chance of lifting a pad.
Dumb question, but how do you seperate the plastic halves? I’ve pulled out every screw I can find, but the front top part is really stuck together.
Thanks, I go my RS 1500 working back again ! replaced “middle 4 ” 22uF also my unit has no cap near LED.
Hi, i hope you can help me. Have you the schematic of this board? I have one on bench and some components are missing. So, i need to know who they are and replace to run tests. Please…
You don’t know how many battery backups I have thrown away over the years bcos I didn’t know to check and replace these radial caps. I sent my Saturday morning reviving two NS1250s and they work like new now. Thank you so much for this webpage. The battery backup companies won’t be getting anymore of my hard earned money.
Hi, Thanks!! I’ve just fixed a RS1500 (230v model) with this. In my case C40 was the one faulty and C41 seems to have been factory replaced. Also the top right capacitor was unpopulated.
Michael Jantzen says:
May 20, 2020 at 10:46 pm
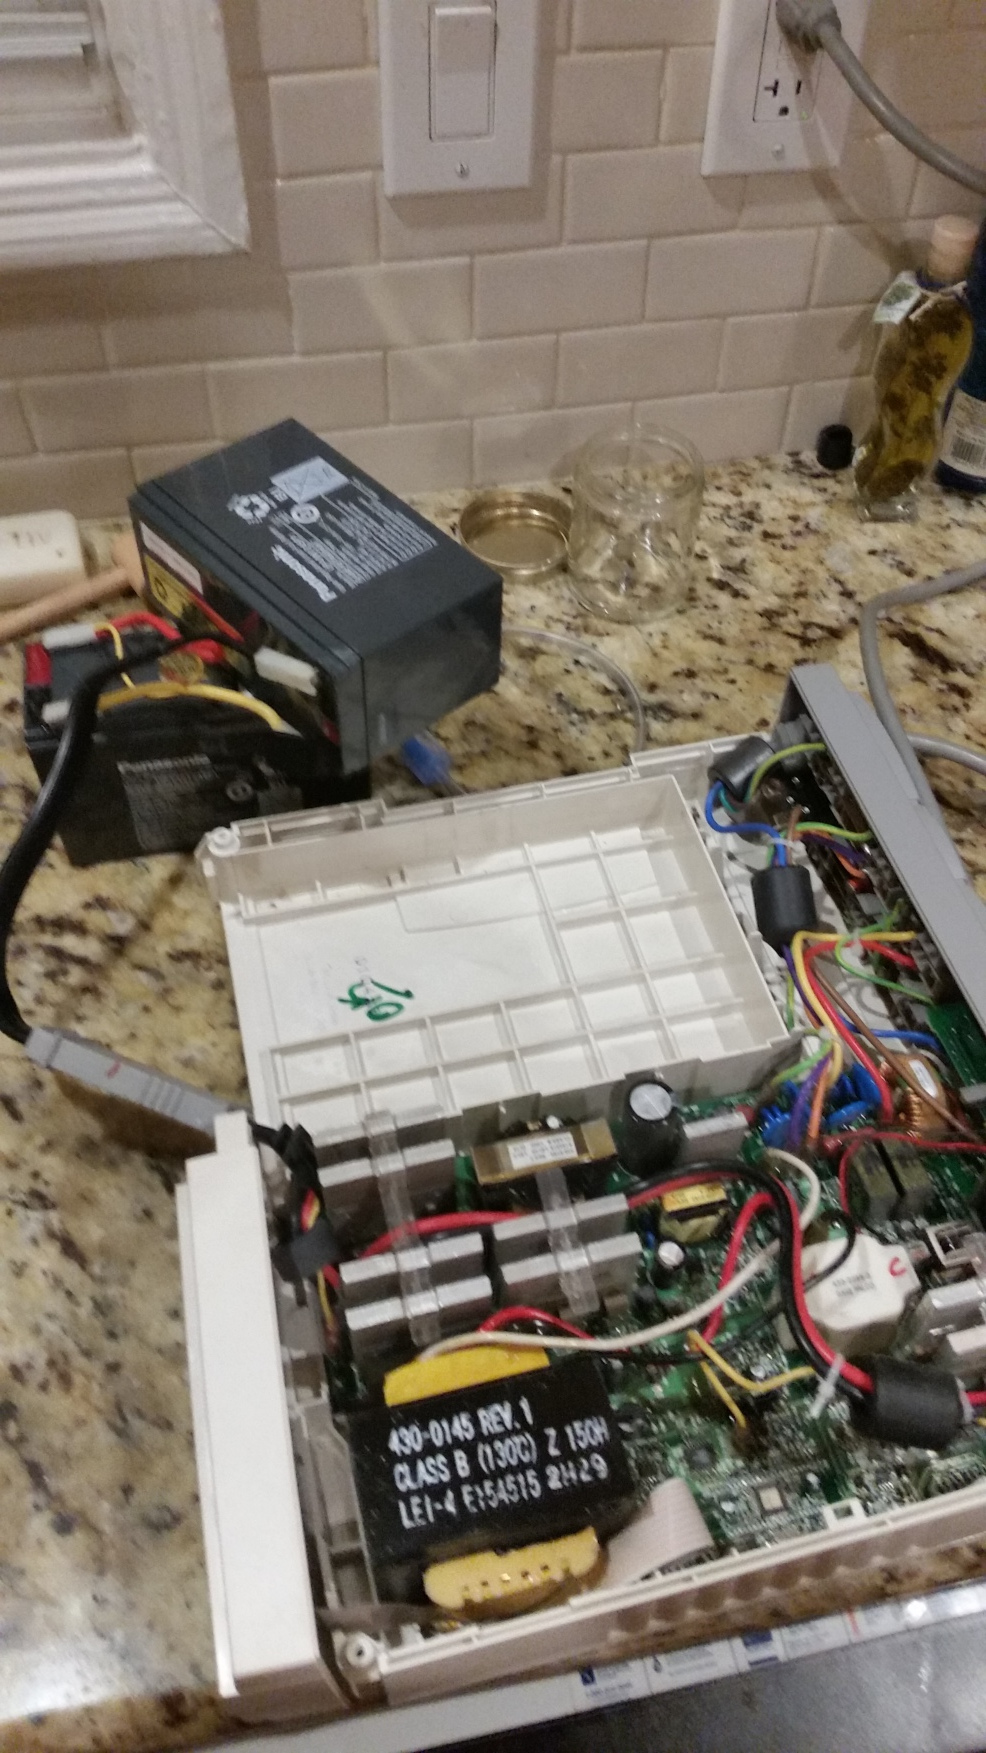
You must take out all of the screws from the back part of the UPS case as well. The end where all of the AC cords plug in. Afterwards, slide that end away from the UPS body, until the back end of the case is exposed. At that point, you should be able to lift off the top-half of the case cover.
Re: Front portion;
If the UPS is standing vertically on the floor, the front fascia “lifts” vertically, away from the floor.
Under the fascia is another screw which needs to be removed in order to separate the halves.
Mine is a Back-UPS XS 1000. Checked all caps with an ESR meter and replaced C49 (10 uF 35 V); C3, C19, C40, and C41 (22 uF 16 V); and C94 (47 uF 16 V). Original caps were Panasonic Series S Type V and replacements are United Chemi-Con MZE series. Now working fine, thanks for the writeup!
Mine is Back-UPS RS 1000. Replace only C41(22?f/16v) with a 22?f/63v 105 degree radial electrolytic capacitor. Perfect fix.